Continuous Delivery with Bitbucket Pipelines
 Photo by PCB-Tech
Message from January 2021
Hey reader! I'm glad you're here.
This blogpost was written back in 2016 when Bitbucket Pipelines were still in beta. Some of its steps could be outdated although nothing much has changed in the way we setup a pipeline in a yaml file.
I originally wrote this blogpost in Medium and I am now bringing it to my own blog/platform.
I might be a bit outdated but I'm happy to keep this on my private archive for future reference.
Happy reading!
The most powerful tool we have as developers is automation.
Scott Hanselman
That being said, how many times have you had to wait until your code being pushed to production because your company didn’t have any automation to do so?
Believe me, there are plenty of companies that don’t have any automation at all. And that includes manual deployment by someone known as very accurate in running a lot of bash, SQL or whatever scripts are needed to get your application up and running.
If you are still facing this situation, this tutorial is a start to get away with the not so good manual Continuous Delivery and send the script ninja guy study something else.
Bitbucket Pipelines
This is a great feature that Bitbucket came up with. If you had worked with Travis CI, the goal of Bitbucket Pipelines is pretty much the same: after every commit your code is built, your tests are executed and, if that is the case, your application is deployed to production.
You also need to be familiar with YAML syntax. It is easy and you can find out more about it in the yaml reference page.
The "hard work" relies on inform which commands are needed to run this step-by-step process.
When I say "step-by-step", I really mean it!
First things first:
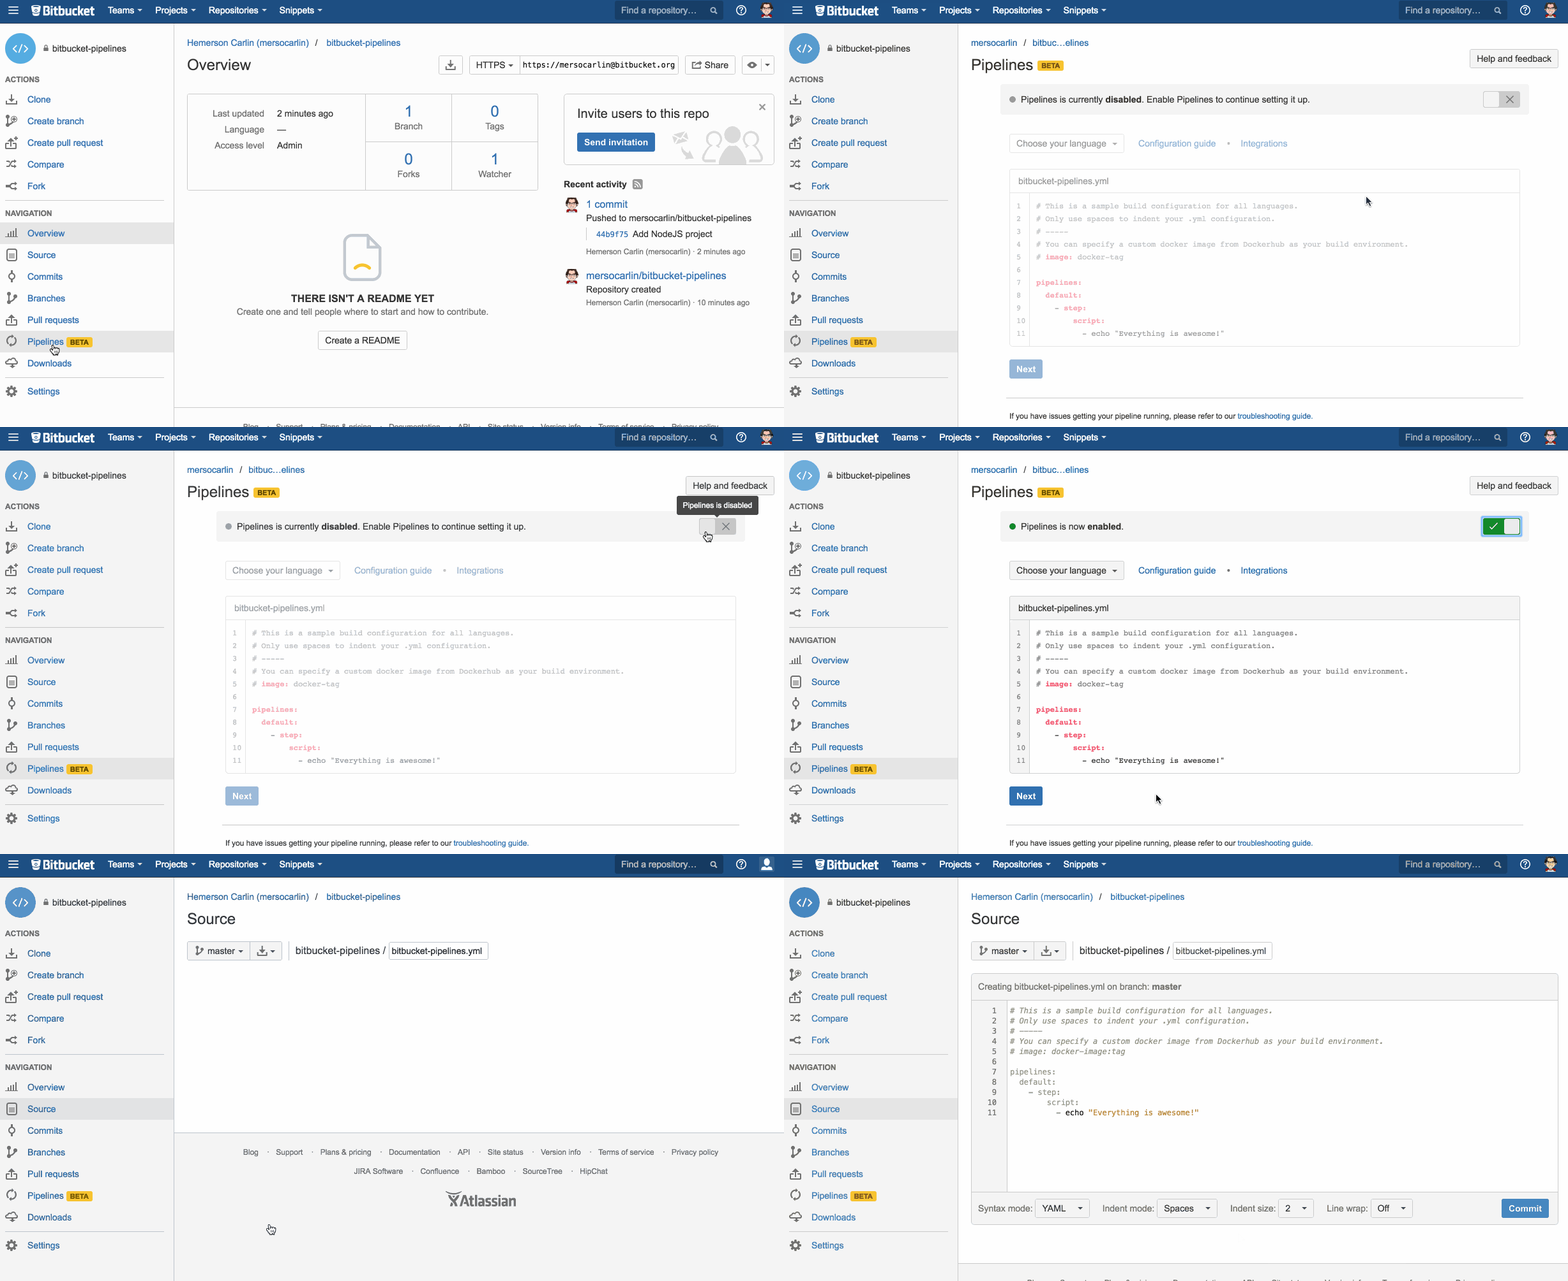
Enable Bitbucket Pipelines in your repository

I'm using this sample project to demonstrate how it works.
Create the bitbucket-pipelines file
My bitbucket-pipelines.yml file is as follows:
image: node # Docker image used to run the build process
pipelines:
  default: # default pipeline (run for all branches)
    - step:
        script:
          - npm install # install project dependencies
          - npm run test # run tests
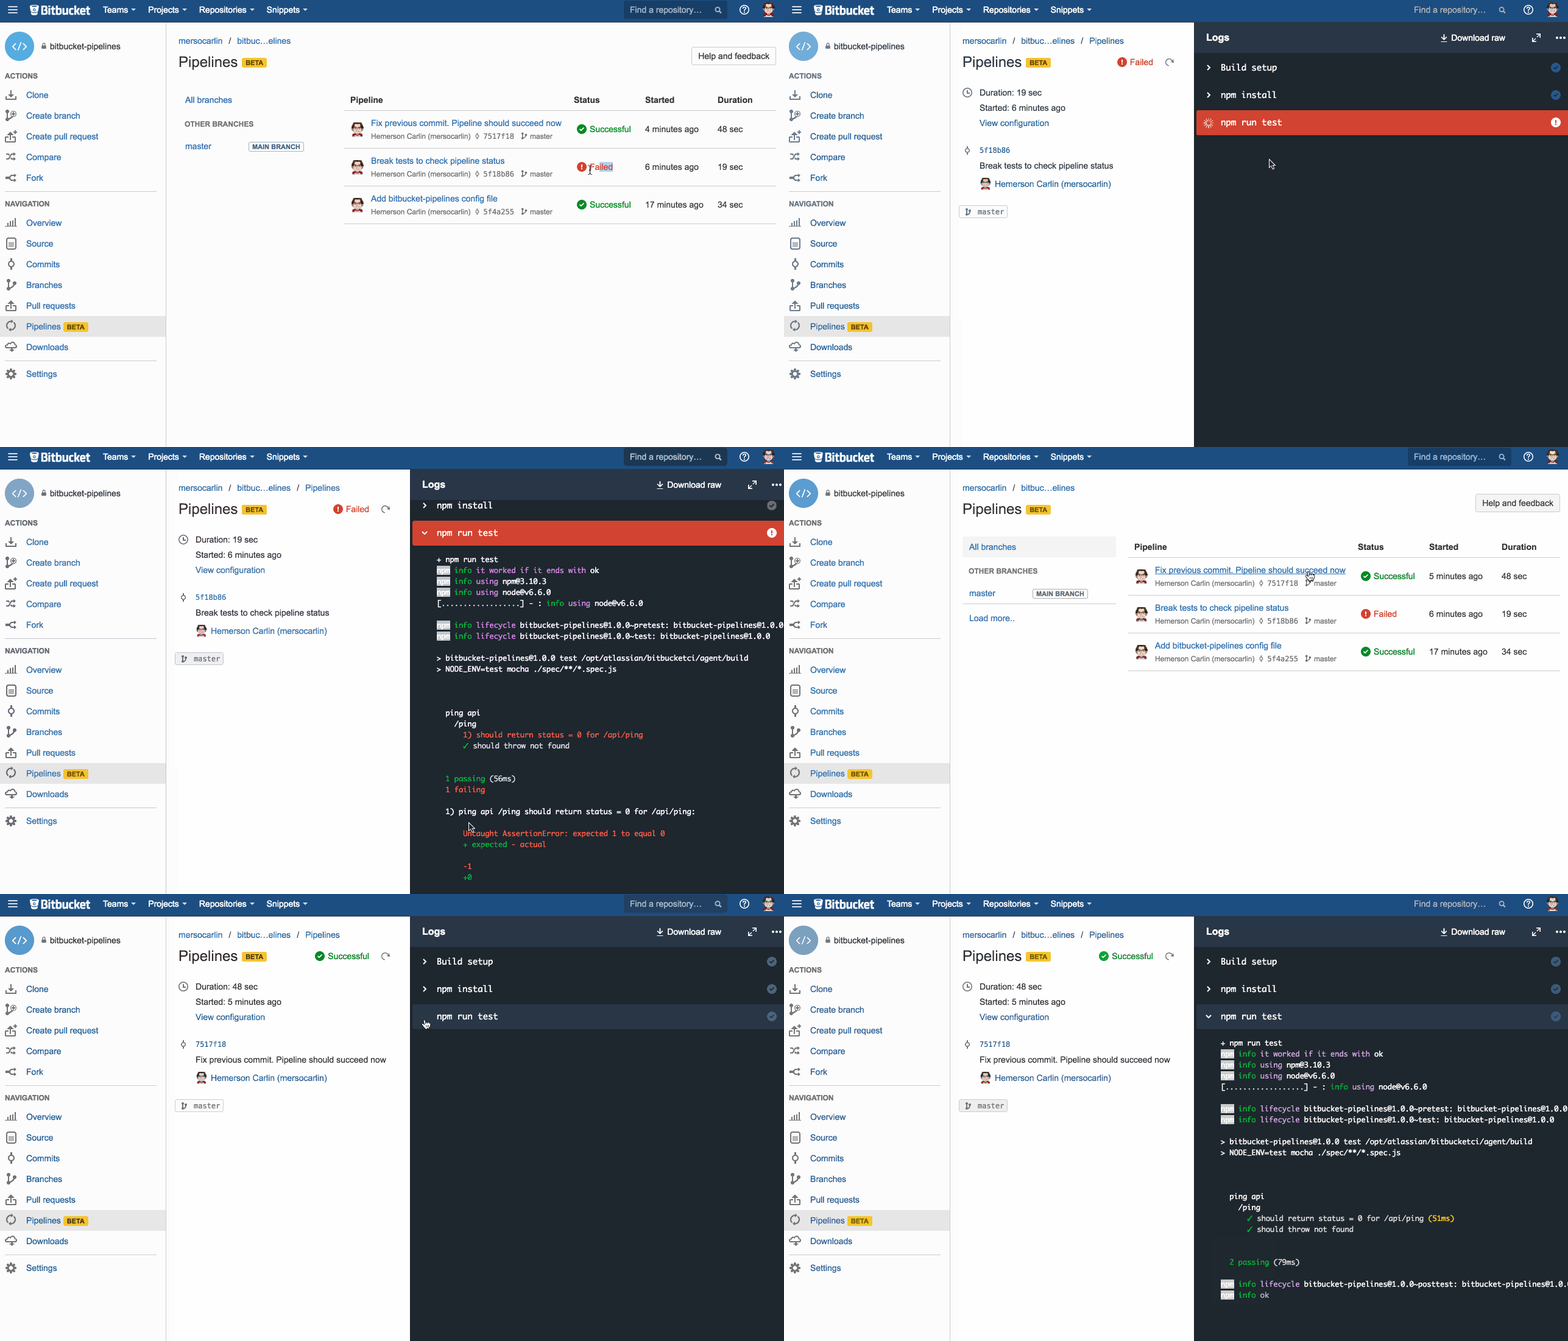
That's it! From now on, every new commit you push to your repository the pipeline is automatically triggered. It is also easy and intuitive to identify whether your most recent code is successful or not.

Having a pipeline in the codebase is definitely a must these days. Not to mention it helps us to ship with confidence regardless of the size of the project and I can't imagine the hassle to work in a codebase without such features.
Did you know you can help me with this page?
If you see something wrong, think this page needs clarification, you found a typo or any other suggestion you might have feel free to open a PR and I will take care of the rest.
My entire site is available to edit on GitHub and all contributions are very welcome 🤙🏼.

Hemerson Carlin, also known as mersocarlin, is passionate and resourceful full-stack Software Engineer with 10+ years of experience focused on agile development, architecture and team building.
This is the space to share the things he likes, a couple of ideas and some of his work.


